
In this article:
Subscribing to a Tiger Technology public plan
Subscribing to a Tiger Technology private offer
Changing your subscription plan
Switching between subscription types
You can find details about each offer in the Tiger Technology seller profile in Microsoft Marketplace. Tiger Technology offers the following options:
- Pay-as-you-go subscription - a usage-based plan where Tiger Technology tracks your usage, and you are billed monthly based on the capacity you consume.
- Subscription with an upfront commitment - a plan with annual reserved capacity where you are billed in advance for a maximum consumption level. If you exceed the selected tier in any given billing period, overage charges apply.
- Professional services - one-time billing for consulting or integration services.
Note: You can subscribe to a Tiger Technology plan through a private offer negotiated specifically to your organization’s needs. For more details refer to Microsoft’s Private Offer Overview guide for buyers.
Regardless of the subscription plan you select, billing and usage tracking are managed entirely through your Microsoft Azure bill.
All transactable offers currently offered by Tiger Technology use the Microsoft Marketplace Software-as-a-Service (SaaS) billing model but the software is not deployed or managed within Tiger Technology’s Azure account. Instead, you install and run the software in your own environment - either on premises or on an Azure Virtual Machine (VM). Once you subscribe to a product, you will receive activation details and instructions for downloading and deploying the software.
Subscribing to Tiger Technology products and services involves the following phases:
- On Microsoft Marketplace, select the plan that matches your requirements.
- Subscribe to the product in the Azure Portal.
- Complete your subscription by setting up your account on Tiger Technology’s landing page.
- Download the product from your customer account on the Tiger Technology Licensing Server and deploy it either on-premises or on an Azure virtual machine (VM).
Before you begin
Before proceeding, make sure that:
- You have an Azure Portal user account with access to an Azure subscription, which is used for billing and for compartmentalization of your purchased cloud resources. The account must have permission to purchase from Microsoft Marketplace. For guidelines, refer to:
How to purchase a SaaS offer in the Azure portal - Marketplace customer documentation | Microsoft Learn
Note: Permission refreshes may take up to an hour before they appear in the Azure portal. So, it is recommended that the right permissions or roles are granted in advance.
Important: If you are subscribing through a private offer, additional prerequisites apply. For more details, refer to Subscribing to a Tiger Technology private offer.
- In Microsoft Marketplace, you have selected your billing region. This allows Microsoft Marketplace to display only offers applicable to your Azure subscription and, if supported, in your currency.
Important: Billing country defaults to United States for users who are not signed in or are signed in but have not specified their billing region preference. To change the billing region, in the footer of Microsoft Marketplace select , select your billing country and preferred language, then select Apply.
Subscribing to a Tiger Technology public plan
- Sign in to your Microsoft Azure account.
- Using the global search bar (located in the top navigation area) of Microsoft Marketplace, search for Tiger Technology.
Microsoft Marketplace displays the products available for purchase in your selected billing region. - Select a listing to view its description.
- In the Plans + Pricing tab of the product page, select Get it now next to the plan that you want to add.
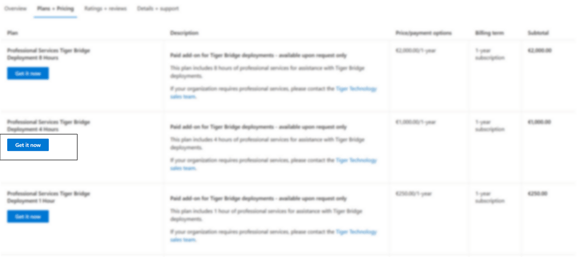
- When Microsoft Marketplace prompts you to confirm the selected plan, select Get it now.

Microsoft Marketplace transfers you to the Azure portal to complete the process. - In the Basics tab of the Subscribe to plan page, do the following:
- Under Project details, select the subscription that will be billed for the selected Tiger Technology plan, and specify an existing or new resource group to organize and manage the associated resources.
Note: If you opt for creating a new resource group within the selected subscription, Azure prompts you to select the region where the group’s metadata should be stored.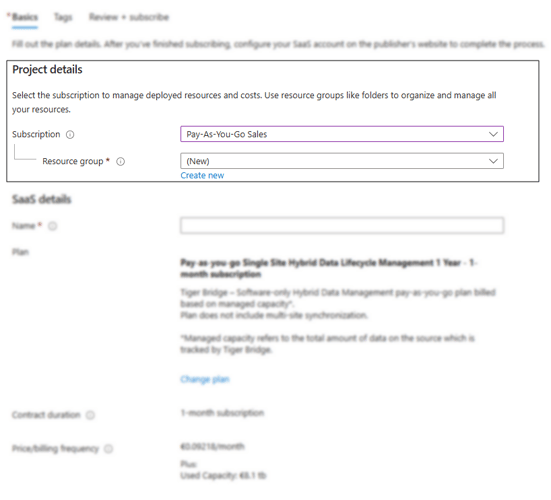
- Under SaaS details, assign a name to the selected Tiger Technology plan to more easily identify it among other subscriptions. Then select whether to automatically renew the subscription after the plan’s predefined billing period expires.
Note: For pay-as-you-go plans, it is advisable to enable automatic renewal of the monthly plan to ensure service and data continuity. If the automatic renewal is turned off, you will receive a reminder before your subscription expires.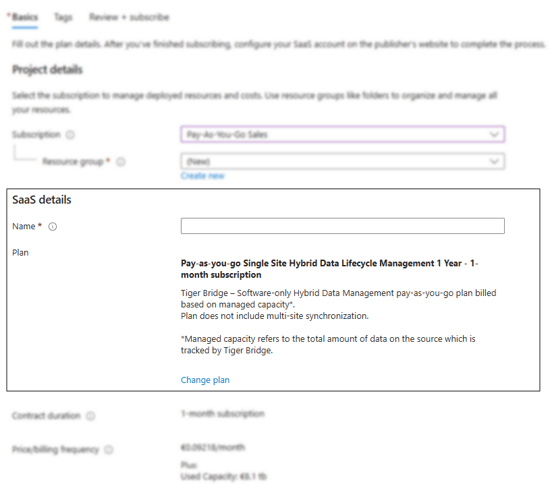
- Under Project details, select the subscription that will be billed for the selected Tiger Technology plan, and specify an existing or new resource group to organize and manage the associated resources.
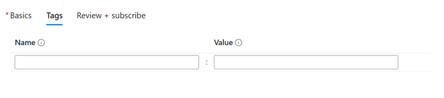
- In the Tags tab of the “Subscribe to plan” page, add tags that help you track and identify costs, organize resources, and automate management of those associated with the Tiger Technology subscription.
- Select Review and subscribe, and if no further changes are needed, select Subscribe.
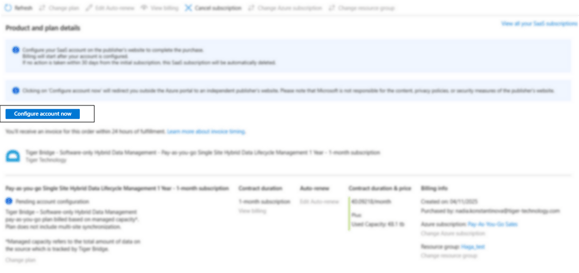
Important: Your subscription is not active until you complete your registration on the Tiger Technology landing page within Azure. You will receive an email with your subscription details and a link to complete your registration on Tiger Technology’s landing page within Azure. For more details, refer to Completing the Registration.
Tip: You can also select Configure account now on the subscription page and proceed to the registration.
Subscribing to a Tiger Technology private offer
You can negotiate a plan tailored to your workflow and pricing requirements by contacting the Tiger Technology sales team. To prepare and submit the private offer through Azure Marketplace, Tiger Technology will request your organization’s Azure billing account ID.
In order to accept and subscribe to a private offer:
- You must have an eligible Azure billing account with:
-
- At least one active Azure subscription associated with the account.
-
- Billing policies that allow Microsoft Marketplace purchases.
-
- A valid payment instrument.
- An account with permissions to accept private offers.
- An account with permissions to purchase Microsoft Marketplace offers.
Note: For detailed guidance on preparing your organization for private offers, refer to Preparing your account for private offers.
Procuring the Private Offer
When Tiger Technology completes the private offer, you will receive an email notification indicating that the offer is ready.
To procure the offer, you must:
- Accept the private offer
- Purchase and subscribe to the private offer
Note: For detailed guidance, refer to Accepting private offers and Purchasing and Subscribing to private offers.
Completing your registration
Tiger Technology software available in Microsoft Marketplace uses the SaaS billing model, but it is not deployed within Tiger Technology’s Azure account. Instead, you install and run the software you subscribed to in your own environment - either on premises or on an Azure Virtual Machine.
You can download the software from the Tiger Technology Licensing Server. To gain access, you must complete your registration for the subscription. Until then, the subscription is with “Pending configuration” status. Unless you complete your registration, it will automatically be deemed void after 30 days, its status will change to Unsubscribed and you will not be billed for the purchase.
To navigate to the Tiger Technology registration page within Azure, you should follow a unique link sent to you by email. To prevent unauthorized use, the registration link is time-limited (typically valid for 1 hour). If the link expires, you can complete your registration manually as described below.
Important: Corporate web filters may pose restrictions on accessing particular URLs. If the unique registration URL does not open, ensure that access to the following domains is allowed on your corporate network:
USA:
https://saas-offer-production-us.azurewebsites.net
Rest of the world:
https://saas-offer-production.azurewebsites.net
- In the Azure portal, navigate to and click the Tiger Technology subscription.
- In the subscription page, selectConfigure account now.
- You are prompted to grant Microsoft Entra permissions needed to complete the subscription activation. Do one of the following:
- Request approval from a global administrator.
- Sign in with an account that can grant consent.
Tip: To learn how to configure user consent settings in Microsoft Entra ID, refer to the following article:
Configure how users consent to applications - Microsoft Entra ID | Microsoft Learn]
- Fill in the registration form and select Register to complete order.
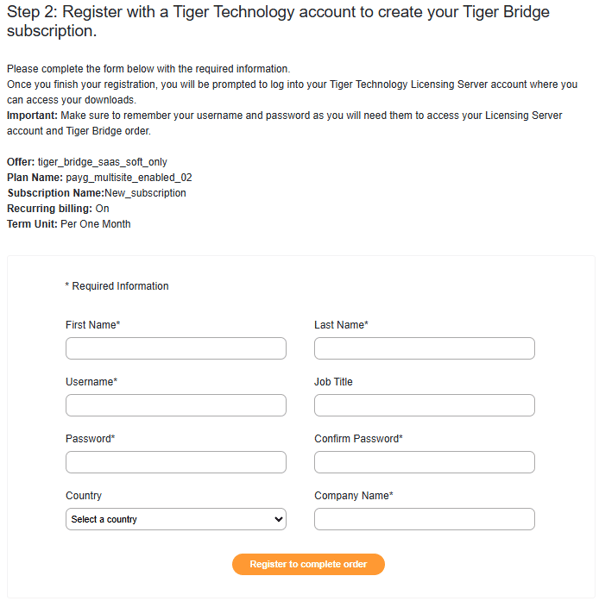
Important: The username and password you provide on the registration form are used to access the Tiger Technology Licensing Server, where you can download your software or access the subscribed services. You can change your contact information and password for access to the licensing server later on. To change your username, you will have to request assistance from the Tiger Technology Azure Marketplace team at azuremarketplace@tiger-technology.com
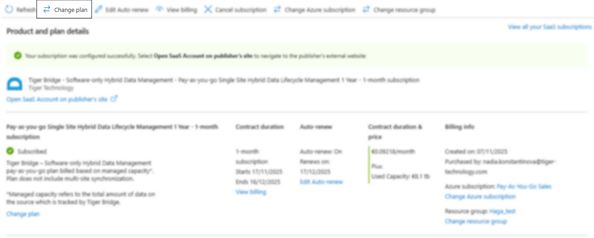
Once registration is complete, the subscription is listed with Subscribed status in the list of your SaaS subscriptions. You will receive an email with instructions on how to download and activate your software. You can also navigate to the Tiger Technology Licensing Server by selecting the “Open SaaS Account on publisher’s site” in the subscription overview page:
Managing active subscriptions
After completing the subscription process, you can view or manage your Tiger Technology subscriptions directly from your account on the Azure portal and manage them the way you would manage any other SaaS subscription in the Azure portal:
- View subscription details such as usage and capacity details, billing rates, expiration, etc.
- Change which Azure subscription is billed for the selected Tiger Technology plan and/or choose another resource group to host its resources.
- Renew a subscription or cancel its automatic renewal.
- Cancel a subscription and receive a refund according to the Refund policies for Microsoft Marketplace:
-
- If you cancel within 72 hours of purchase, you are eligible for a full refund excluding any metered consumption charges accrued during that time.
- If you cancel after 72 hours of purchase, to request a refund you must contact Tiger Technology. If Tiger Technology approves the request, we will submit a ticket to process the cancellation and refund through Marketplace.
Changing your subscription plan
Note: Some modifications to a subscription cannot be performed automatically within the Azure portal and require assistance from Tiger Technology. Contact the Tiger Technology Azure Marketplace team at azuremarketplace@tiger-technology.com to request a change the parameters of an accepted private offer.
You can change your current Tiger Technology plan to another plan of the same billing term and payment type (for example, from Pay-as-you-go Single Site Hybrid Data Lifecycle Management to a Pay-as-you-go Global Collaboration and Hybrid Data Lifecycle Management or upgrade the upfront commitment tier of your current subscription). The changes you make to a plan take effect immediately, and the billing is prorated according to the billing term of the current plan.
To change your current plan, you must have Owner or Contributor permissions. Additionally, your current subscription should be in a state that allows changes - you may need to wait until the current billing term is over before making any adjustments. For more information refer to:
Software as a Service Subscription Lifecycle Management - Marketplace customer documentation | Microsoft Learn
To change your plan within the same subscription type:
- In the Azure portal, navigate to your active Tiger Technology subscription.
- At the top of the page, select Change plan.
- Select the plan that you want to switch to and click Change plan.

Switching between subscription types
Note: Some modifications to a subscription with an upfront commitment cannot be performed automatically within the Azure portal and require assistance from Tiger Technology. Contact the Tiger Technology Azure Marketplace team at azuremarketplace@tiger-technology.com to convert from an upfront commitment subscription to a pay-as-you-go subscription.
You can switch from a pay-as-you-go subscription to a plan with an upfront commitment, with minimal interruptions to your workflow.- Towards the end of the chosen billing period, cancel your current pay-as-you-go subscription.
- Subscribe to the offer that you want to upgrade your current subscription with, by following the steps in Subscribing to a Tiger Technology product.
- When you receive the unique link to complete the registration for your new subscription, the system automatically detects that you are an existing customer.
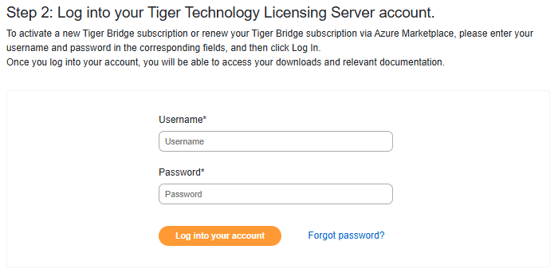
- Click “Sign in to my Tiger Technology account” and provide the account password.
Once you complete the registration on the Tiger Technology landing page within Azure, your new subscription becomes active, and you can continue using the product or service with the updated parameters.